Astrophotography Settings for Sony Cameras
A practical guide to camera setup and settings for photographing the night sky, including Milky Way and aurora.
Camera Bodies
The Sony A7 series works well for astrophotography. Key features to look for:
- Good high ISO performance – You’ll be shooting at ISO 3200-6400 regularly
- Full frame sensor – Better low light performance than crop sensors
- Bright Monitoring feature – Makes composing in the dark much easier
The A7R V, A7 IV, and A7 III are all capable astrophotography cameras.
Lens Recommendations
Fast wide-angle lenses make the biggest difference in astrophotography:
- FE 14mm F1.8 GM – Excellent for wide Milky Way shots
- FE 16mm F1.8 G – Great balance of field of view and speed (this is what I use most often)
- FE 20mm F1.8 G – Versatile for both astro and general landscape
- FE 16-35mm F2.8 GM II – Flexibility to zoom, though one stop slower than primes
- FE 12-24mm F2.8 GM – Ultra-wide for dramatic foregrounds
The key is maximum aperture. f/1.8 lets in significantly more light than f/2.8, which means shorter exposures and less noise.
Bright Monitoring Setup
This is one of the most useful features for night photography composition.
To set up:
- Assign Bright Monitoring to a custom button (I use C4)
- When composing in the dark, press and hold the button
- The screen brightness boosts significantly, letting you see your composition in real-time
- Release when you’re ready to shoot
This saves you from taking test shots just to see what’s in frame.
Basic Camera Settings
| Setting | Recommendation |
|---|---|
| Mode | Manual (M) |
| ISO | 3200-6400 (start at 3200, increase if needed) |
| Aperture | Wide open (f/1.8, f/2, or f/2.8 depending on lens) |
| Shutter Speed | Use NPF rule (see below) |
| White Balance | 3900-4200K for natural night tones |
| Focus | Manual (see focusing section) |
| Long Exposure NR | OFF (it doubles your shooting time) |
| High ISO NR | Low or OFF |
| File Format | RAW |
Shutter Speed: The NPF Rule
The old “500 rule” produces star trails on modern high-resolution sensors. Use the NPF rule instead.
PhotoPills method:
- Open PhotoPills
- Go to Spot Stars calculator
- Enter your camera and lens details
- It calculates the maximum exposure time before stars start trailing
For a 16mm lens on the A7R V at f/1.8, you’re typically looking at around 8-15 seconds depending on your tolerance for trailing.
Focusing at Night
Getting sharp focus on stars is one of the trickier parts of astrophotography.
Method 1: Live View Magnification
- Point at a bright star or distant light
- Switch to manual focus on the lens
- Use the magnify button to zoom in on the star
- Adjust focus ring until the star is a pinpoint (not a blob)
- Take a test shot and check at 100% zoom
Method 2: Focus Bracketing for Foreground + Stars
When you need both a close foreground and stars sharp, use focus bracketing. The key point: keep the lens AF switch ON while setting focus mode to Manual via the camera menu.
See the Focus Bracketing guide for the full process.
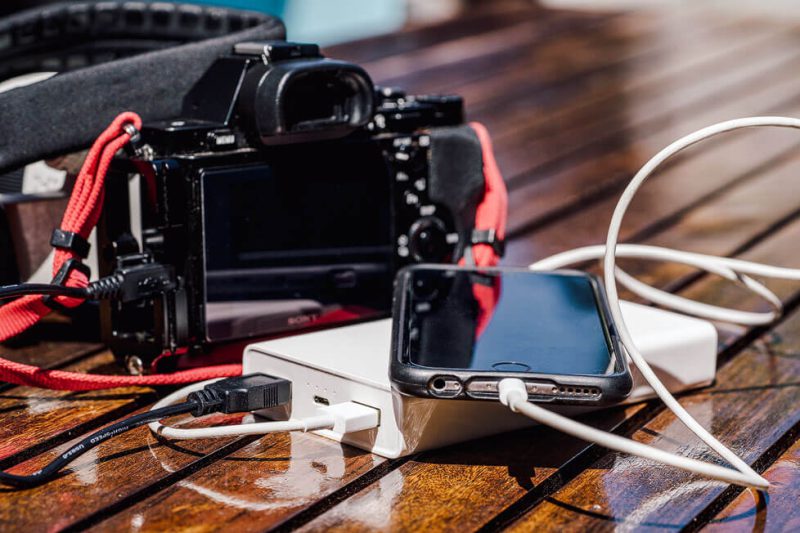
Torch Recommendations
Use a white LED head torch, not red.
While red torches preserve night vision, the red colour cast is extremely difficult to remove in post-processing and can ruin images. A brief white light exposure has minimal impact on night vision (recovers in minutes) and is much easier to white-balance if accidentally in frame.
Dim the torch to the minimum needed for camera operation.
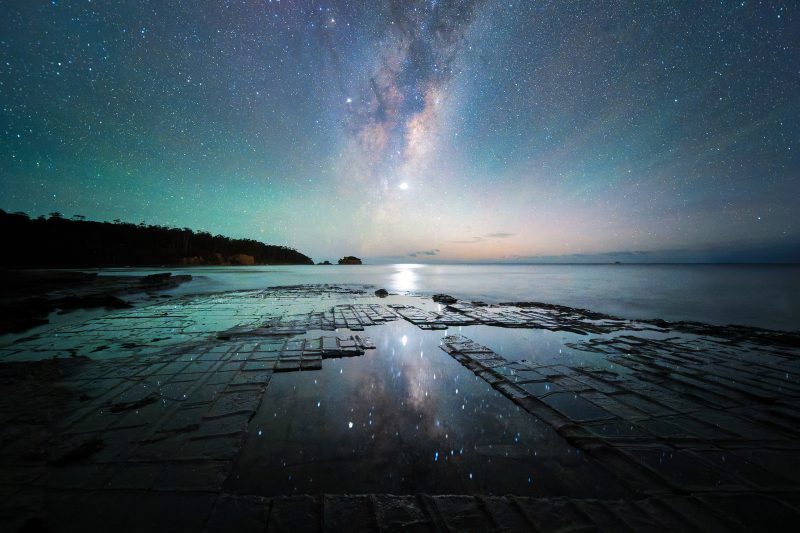
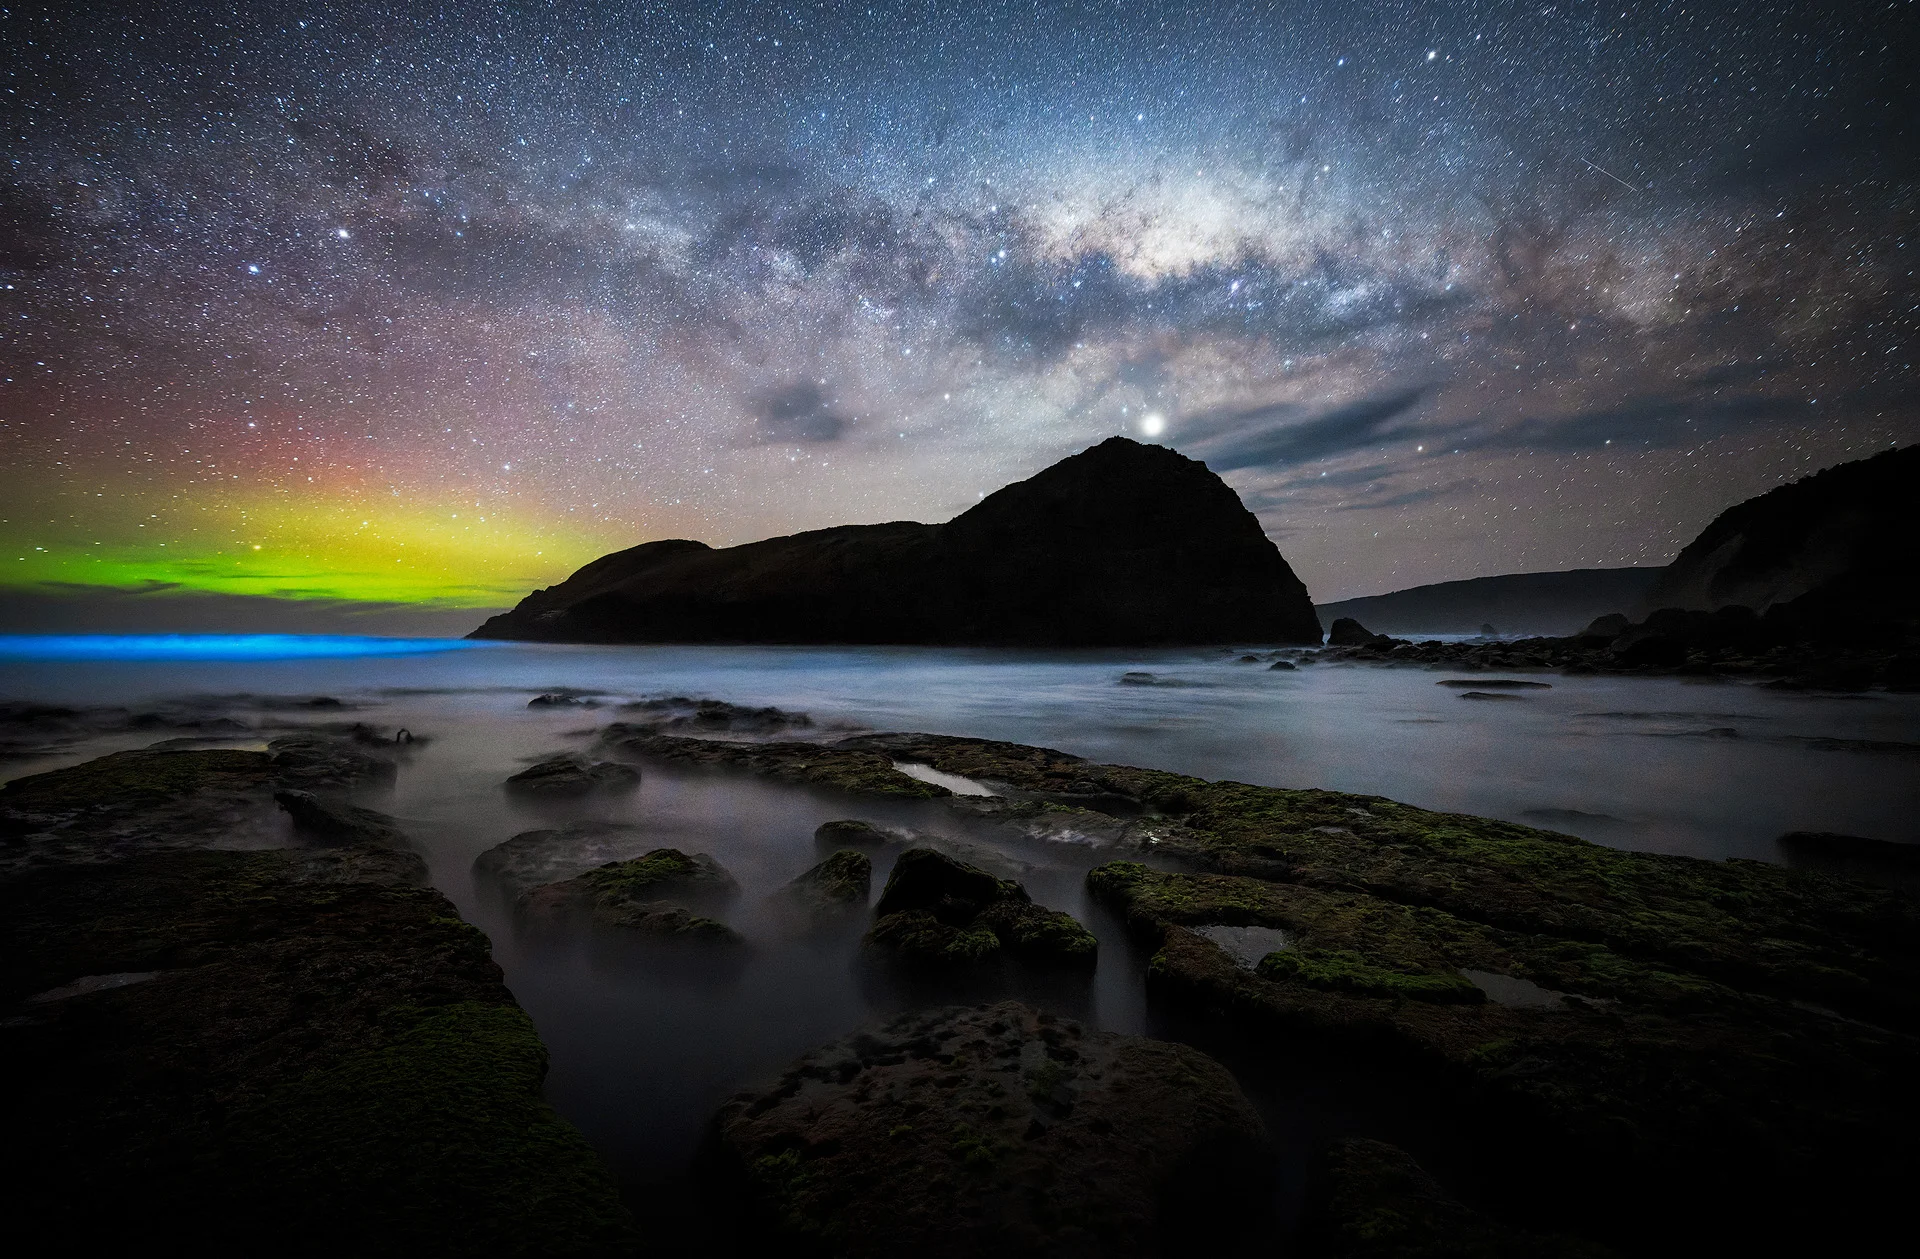
Aurora-Specific Settings
When aurora is active, you’ll need to adjust your settings:
| Aurora Intensity | ISO | Shutter Speed |
|---|---|---|
| Faint (Kp 3-4) | 3200-6400 | 15-25 seconds |
| Moderate (Kp 5-6) | 1600-3200 | 8-15 seconds |
| Strong (Kp 7+) | 800-1600 | 4-8 seconds |
With bright aurora, you need shorter exposures to capture the movement and structure. Too long an exposure and the aurora becomes a green blur rather than showing curtains and rays.
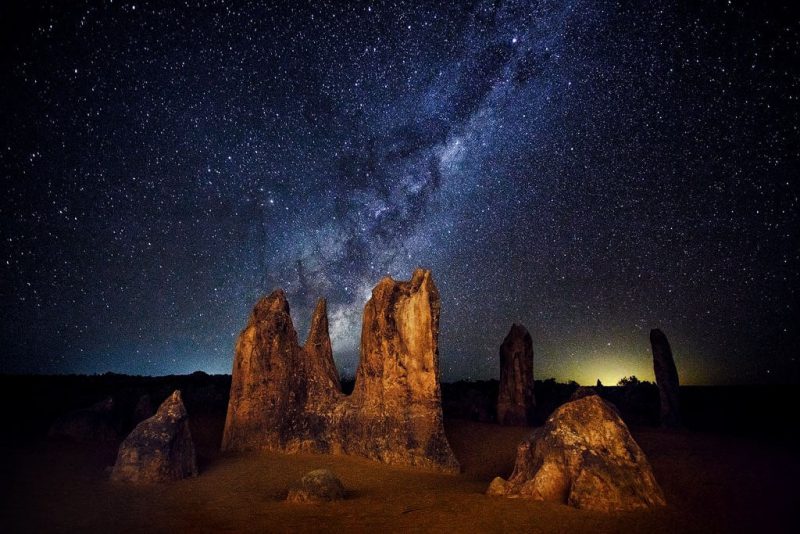
Planning Your Shoot
Moon Phase: Plan astrophotography shoots within 5 days either side of new moon. A bright moon washes out the Milky Way and reduces the number of visible stars.
Useful Apps:
- PhotoPills – Milky Way positioning, exposure calculator, NPF rule
- Glendale Aurora Alerts – Aurora forecasting for southern hemisphere
- SpaceWeatherLive – Solar activity and aurora predictions
Weather: Use Windy.com to check cloud cover forecasts. Look for clear skies and low humidity.
Post-Processing
Noise Reduction: Modern AI-based noise reduction (Lightroom’s Denoise feature, DxO Pure Raw, Topaz DeNoise) works remarkably well with high ISO astro images.
Stacking: For even cleaner results, capture multiple frames of the same composition and stack them using Sequator (free) or similar software.
The biggest factors in astrophotography results are lens speed (f/1.8 beats f/2.8) and accurate focus. Get those right and everything else falls into place.